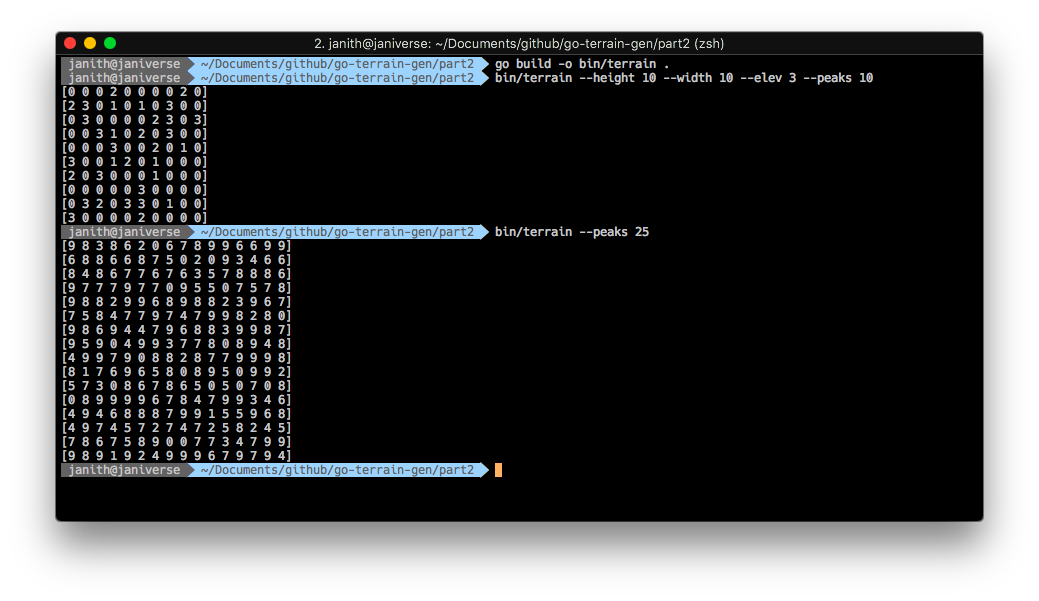
In the last part, we refactored the code and added CLI flags. The output right now looks like this:

It doesn't really give us a sense of what the terrain looks like, though. Let's change that.
Unicode
Unicode has some nice characters that can help us here. The ones we're going to use today are:
U+2591      ░       Light shade
U+2592      ▒       Medium shade
U+2593      ▓       Dark shade
U+2588      █       Full block
We can update the Print() function to use these new shade blocks. We've also
added a space to get the "no shade" effect.
func (f *fullMap) Print() {
    mapShades := [5]string{" ", "░", "▒", "▓", "█"}

    // print out map
    for h := 0; h < f.height; h++ {
        for w := 0; w < f.width; w++ {
            // print a space (black) if elevation is zero
            if f.elements[h][w] == 0 {
                print(" ")
                continue
            }

            // get the approximate shade nearest to the elevation number
            elementShade := float64(f.elements[h][w]) / float64(f.elevation) * float64(len(mapShades)-1)

            // get its index
            shadeIndex := int(math.Round(elementShade))

            // print out the corresponding unicode char
            fmt.Print(mapShades[shadeIndex])
        }

        // print a newline
        fmt.Println()
    }
}
Go takes its types very seriously, so someone coming from a dynamically typed language like PHP or Javascript might be a bit confused. But trust me, it is well worth the trouble to specify all the type conversions manually, as the compiler helps you find bugs with data types that would otherwise plague you at runtime.
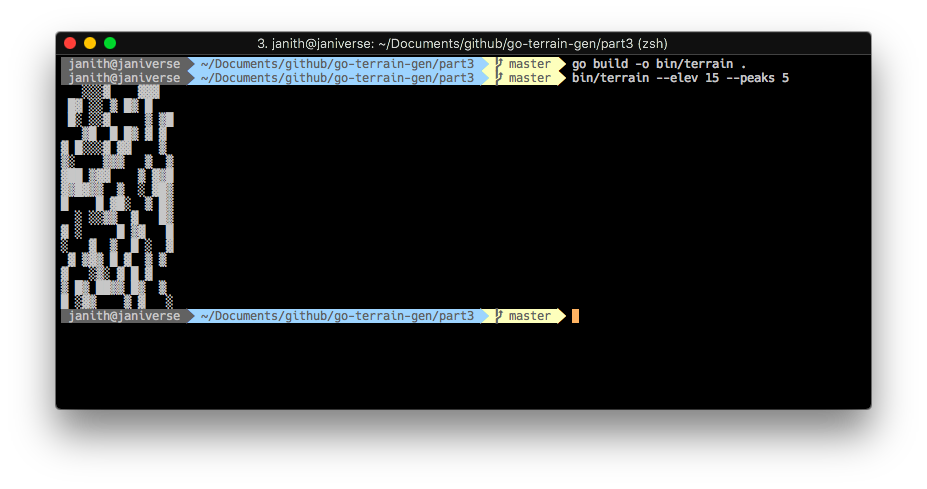
Let's compile and run it!

Very cool. I think it gives a good idea of how bad the generation algorithm currently looks. 😅
Colour
Terminals support colour, and all you got to do is send an ANSI escape
sequence1 with your output. The colours I want to use are blue and cyan
for the sea and shallows, and green and yellow for the fields and mountains.
We'll modify Print() to add these and output the codes:
func (f *fullMap) Print() {
    mapColours := [4]int{36, 34, 32, 33} // blue, cyan, green, yellow
    mapShades := [4]string{"░", "▒", "▓", "█"}

    // print out map
    for h := 0; h < f.height; h++ {
        for w := 0; w < f.width; w++ {
            // print a space (black) if elevation is zero
            if f.elements[h][w] == 0 {
                print(" ")
                continue
            }

            // get the approximate colour nearest to the elevation number
            elementColour := float64(f.elements[h][w]) / float64(f.elevation) * float64(len(mapColours)-1)

            // get the colour index
            colourIndex := int(math.Round(elementColour))

            // get the approximate shade within that colour
            elementShade := (elementColour - math.Floor(elementColour)) * float64(len(mapShades)-1)

            // get its index
            shadeIndex := int(math.Round(elementShade))

            // print out the corresponding ANSI code and unicode char
            fmt.Printf("\033[%dm%s\033[0m", mapColours[colourIndex], mapShades[shadeIndex])
        }

        // print a newline
        fmt.Println()
    }
}
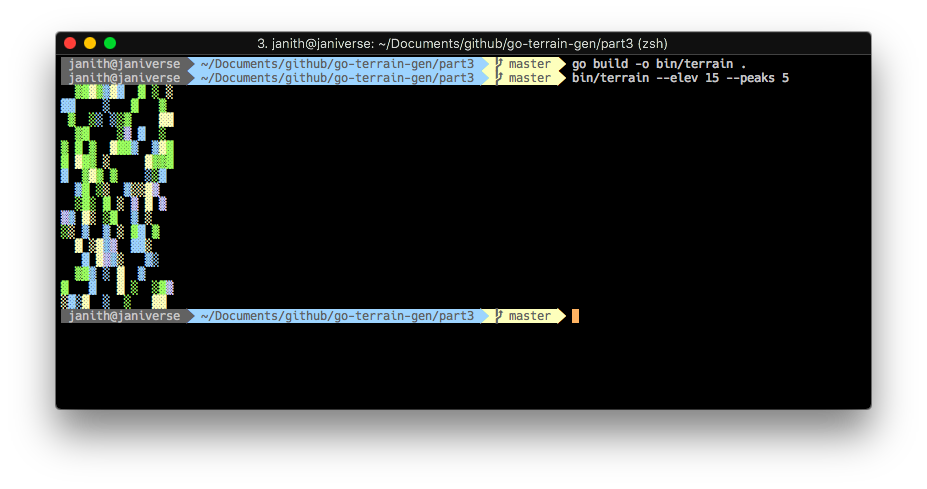
We first get the colour index, and then get the shade index within that colour. Let's compile and run it with the same flags as before:

Fabulous! ❤️💚💙
Being able to visualise your output is an important part of building any program (which is a reason wireframes exist, I guess). With the graphics sorted, our next improvements to the system2 will be more apparent when we implement them.
The full code for this part can be found on Github.
-
I learned this only yesterday! Rosetta Code has code on how it's done in all the languages. ↩
-
I'm planning to cover assigning values to elements near the peaks, and how introducing a bit of randomness will help make things more realistic. ↩